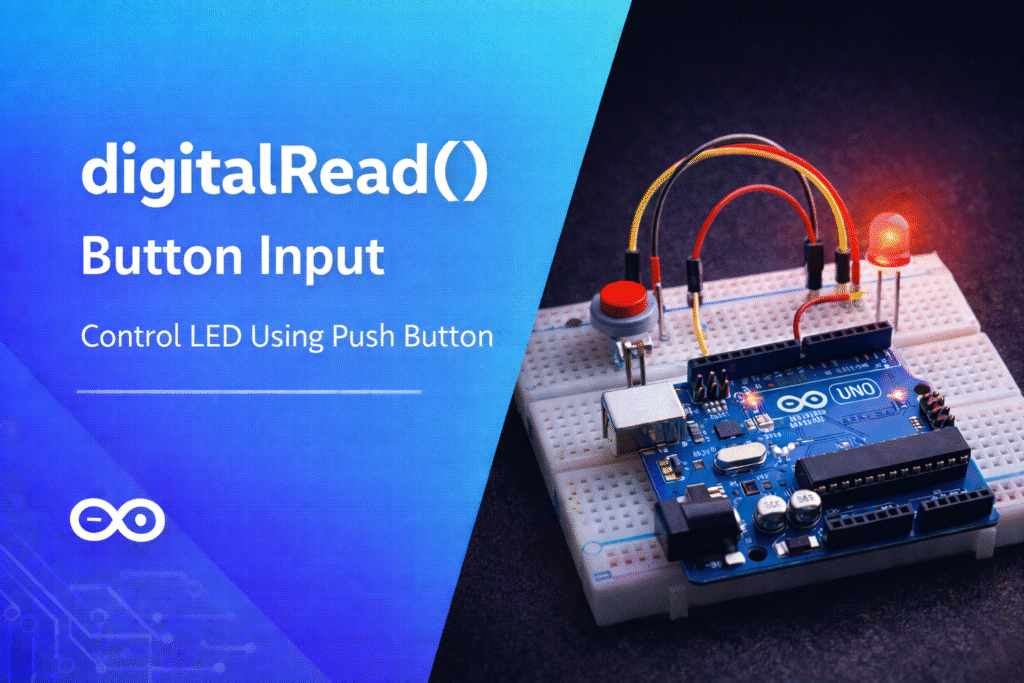
Have you ever played with a light switch? You flip it, and the light turns on or off. Arduino has a way to check if a switch (or button) is on or off using something called digital Read.
Digital Read is like asking a question: “Is the button pressed?” Arduino checks the button and gives you an answer: “Yes, it’s on” (HIGH) or “No, it’s off” (LOW). It helps your Arduino project know what’s happening with buttons, sensors, and other inputs.
Digital Read
Connect Your Button: Attach a button to one of the Arduino’s pins.Set the Pin Mode: Tell Arduino that this pin will be used to read data by writing pinMode(Pin, OUTPUT).
Read the Pin: Use digitalRead(Pin); to check if the button is pressed. If it is, Arduino will say “HIGH”; if not, it will say “LOW”.
Digital Read Example: Reading a Button State
Hardware Requirements
1 x Arduino UNO
1 x 220R Resistor
1 x Led
1 x Push Button
1 x 10K Resistor
1x Breadboard
Some jumper wire
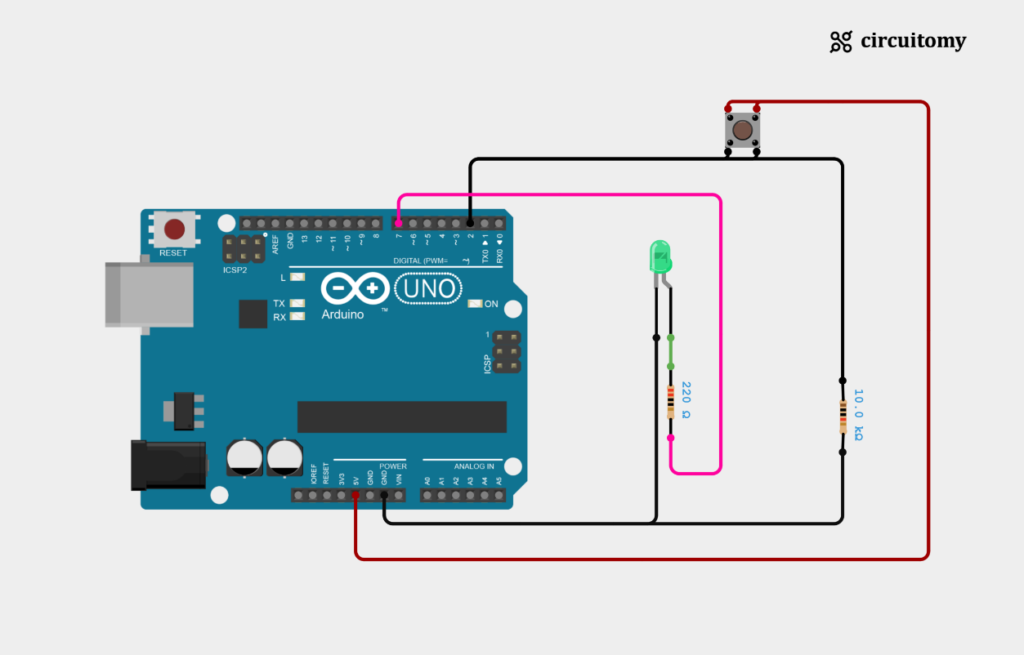
Circuit Diagram

Fig: Interfacing led and button with Arduino
LED Connection:
| LED Pin | Arduino Pin |
| LED’s Positive (Anode) Pin | D7 (Digital Pin 7) |
| LED’s Negative (Cathode) Pin | GND |
Button Connection:
| Button Pin | Arduino Pin |
| Button One side | 5V |
| Button other side | D2 (Digital Pin 2) |
In this setup, when you press the button, it sends a signal to pin 2. The Arduino reads this signal and turns on the LED connected to pin 7. This is a simple way to learn how to use a button to control an LED using Arduino.
The push button is connected to an external pull-down resistor, which makes the Arduino input signal pin read HIGH when the button is pressed and LOW when the button is not pressed.
Code
// Set pin numbers
int buttonPin = 2;
int ledPin = 7;
int buttonState = 0;

void setup() {
  // Initialize the LED pin as an output
  pinMode(ledPin, OUTPUT);
  // Initialize the button pin as an input
  pinMode(buttonPin, INPUT);
}

void loop() {
  // Read the state of the button
  buttonState = digitalRead(buttonPin);

  // Check if the button is pressed
  if (buttonState == HIGH) {
    // Turn the LED on
    digitalWrite(ledPin, HIGH);
  } else {
    // Turn the LED off
    digitalWrite(ledPin, LOW);
  }
}
1. Set the PIN Number
int buttonPin = 2;
int ledPin = 7;
int buttonState = 0;
buttonPin = 2; This sets pin 2 on the Arduino as the pin where the button is connected.
ledPin = 7; This sets pin 7 on the Arduino as the pin where the LED is connected.
buttonState = 0; This creates a variable to store the button’s state (whether it’s pressed
2. Setup Function
void setup() {
  // Initialize the LED pin as an output
  pinMode(ledPin, OUTPUT);
  // Initialize the button pin as an input
  pinMode(buttonPin, INPUT);
}
pinMode(ledPin, OUTPUT); This tells the Arduino that the LED pin (pin 7) will send out signals (output).
pinMode(buttonPin, INPUT); This tells the Arduino that the button pin (pin 2) will receive signals (input).
3. Loop Function
void loop() {
  // Read the state of the button
  buttonState = digitalRead(buttonPin);
buttonState = digitalRead(buttonPin); This reads the current state of the button (HIGH if pressed, LOW if not) and stores it in buttonState.
4. Check Button State
// Check if the button is pressed
  if (buttonState == HIGH) {
    // Turn the LED on
    digitalWrite(ledPin, HIGH);
  } else {
    // Turn the LED off
    digitalWrite(ledPin, LOW);
  }
}
if (buttonState == HIGH); This checks if the button is pressed. If it is (buttonState is HIGH):
digitalWrite(ledPin, HIGH);The LED is turned on by sending a HIGH signal to pin 7
else the button is not pressed (buttonState is LOW):
digitalWrite(ledPin, LOW); The LED is turned off by sending a LOW signal to pin 7.
This code reads the state of a button connected to pin 2. When the button is pressed, it sends a HIGH signal to pin 2, which makes the Arduino turn on the LED connected to pin 7. When the button is not pressed, the signal is LOW, and the LED is turned off. This loop runs continuously, checking the button and controlling the LED accordingly.
Applications
1. Control Systems: This simple button-LED interaction can be expanded to control different devices, such as motors, relays, or other components. For instance, pressing a button could start or stop a motor.
2. Interactive User Interfaces: The code can be adapted for projects that require basic input from users, such as toggling between modes in a device (e.g., turning on and off different lights, adjusting brightness, or selecting settings).
3. Event-Driven Actions: In more complex projects, the button could trigger more advanced actions. For example:
Security Systems: A button press could trigger an alarm.
Home Automation: A button press could control various appliances (lights, fans, etc.).
4. Button Debouncing: In the future, as your projects grow, you might encounter problems where the button gives multiple readings (due to physical bouncing). You can enhance this by implementing debouncing techniques to ensure accurate readings.
5. Multiple Inputs and Outputs: This basic setup can be scaled by adding more buttons and LEDs (or other components) to create a more interactive project with multiple control points.
