When you’re working on Arduino projects, sending data to your computer is like giving your project a voice. Whether you want to display a simple message or track data, sending information from your Arduino to your computer helps you see what’s happening in your project. It’s a powerful tool for debugging, monitoring, and interacting with your Arduino.
Sending data is crucial for checking if your project is working as expected. It allows you to monitor the status of your project, see messages directly from your Arduino, and ensure everything is functioning correctly. Even a simple message like “Hello, Circuitomy!” can confirm that your serial communication is working perfectly.
Example: Sending a Simple Message
Hardware Requirements
1x Arduino UNO
Code
void setup() {

  Serial.begin(9600); // Start serial communication at 9600 baud

}

void loop() {

  Serial.println("Hello, Circuitomy!"); // Send the message to the serial monitor
  delay(1000); // Wait for 1 second before sending the message again

}
Serial.begin(9600); This line initializes the serial communication at a speed of 9600 bits per second.
Serial.println(“Hello, Circuitomy!“); This sends the message “Hello, Circuitomy!” to the serial monitor on your computer.
delay(1000); The loop pauses for 1 second before sending the message again, so you receive it every second.
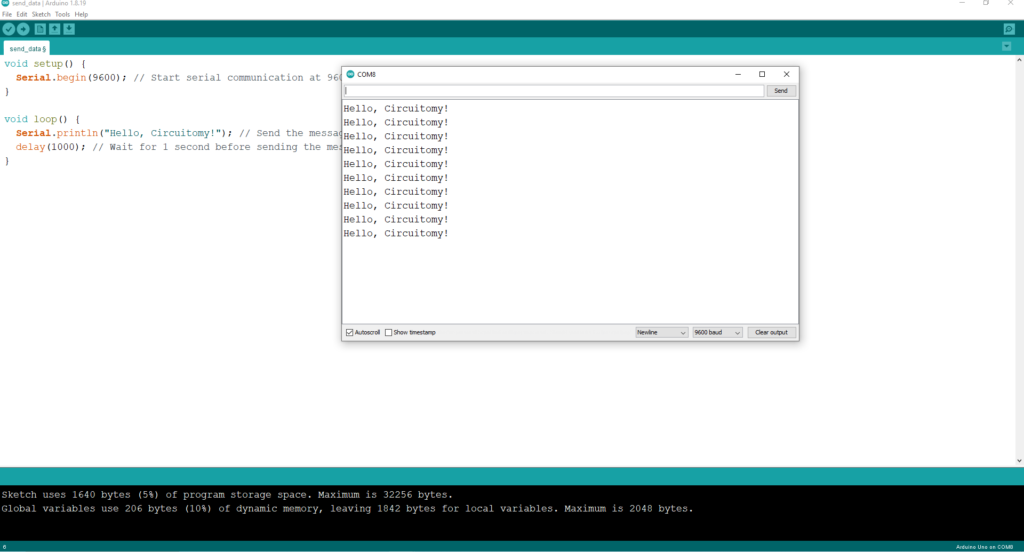
Serial Terminal:

This simple example shows how easy it is to send data from your Arduino to your computer. By sending a message like “Hello, Circuitomy!” you can confirm that your Arduino is correctly set up to communicate with your computer. It’s a small but essential step in many Arduino projects.
